14/02/2016

Armorcast Warhound #1 - 15


Shield generator fabricated, glued and ready for the paint.

And now I placed the banner support to the backwards position, I need... a banner.

I'm working on it, as you can see on the left.

09/02/2016

Armorcast Warhound #1 - 14

Now the superbowl is over, I can finally post.
(even if I'm french, I was in front of my tv to watch it !)


I decided to add a shield generator to the warhound.

It will be inspired by the Knight Errant, still in WiP.


On the left, some sketches to get it right.
I'm not far away from the final form.


As you can see above, I prepared a paper form before cutting the plastic.
It help to see the generator IRL. Almost.
Finally, the generator will have a diamond shape, and will be smaller.
 
Last but not least, the banner will be moved backwards.

01/02/2016

Armorcast Warhound #1 - 13

Working on the banner's chains.

I used .8mm chains.

Now I need to find the best length.

25/01/2016

Armorcast Warhound #1 - 12

Now I'm done with the banner support on the mega bolter, I wandered on the net.
And I saw this heavily modified warhound.
The amount of details added onthis titan is impressive and it gave me ideas.
One Games Workshop barrel cuted in half, some plastic card later, et voilĂ .

17/01/2016

Armorcast Warhound #1 - 11

I was productive this week. 

First : magnets under the right foot are done ! 
Three 5 mm magnets will help to keep the warhound up, while I didn't decide what I'll do under the left foot.

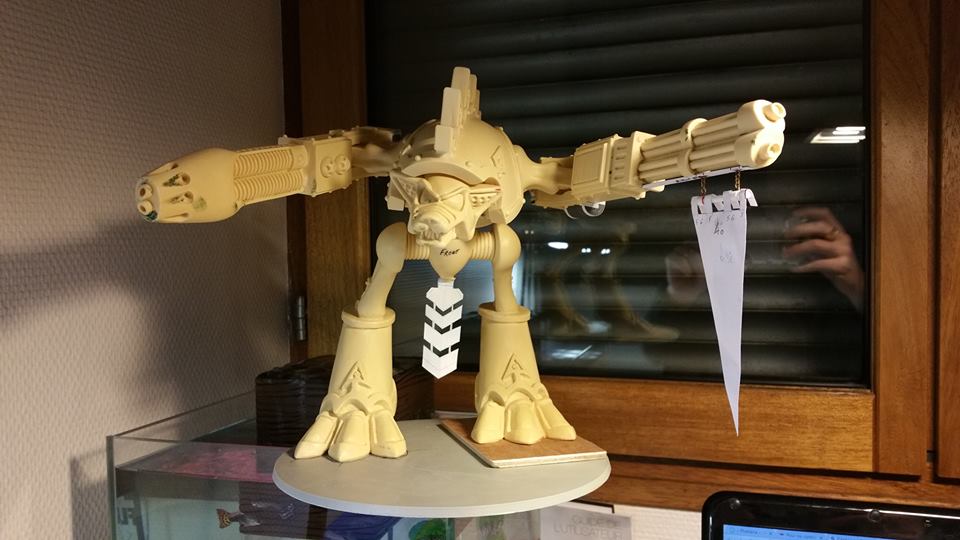
Then, I added some banners.
And that didn't fit.
At all.

I decided to cut the width by half, and to keep the pointy one.

Problem was, with the new width, banners didn't fit under the Mega Bolter anymore.

I decided to add some protection
to the underside. 

Slowly and very carefully, I removed enough resin to allow the new 85 x 4 mm plastic card part to fit in.

It's thickness is only .3mm, which isn't enough.
I'll try with a .75mm and I hope the result will be better.

07/01/2016

Armorcast Warhound #1 - 10

Hello everybody, I'm back.
Sorry for the delay, seems my last post didn't on the right blog, 
and I hadn't the internet nor the PC for a long time so... I'm sorry for this delay.

Good news are good : I'm back on tracks for the warhound.


Both arms and rear alimentation and command racks are done.
It took me time, try and error, do and undo...
But it's finally done.

I magnetised all the panels, to make it easy to remove and transport.

10/12/2015

Armorcast Warhound #1 - 09

More details.
 Right side : added some cooling elements.
Left side : the other cooling elements.