Oftlenly, readers and players ask me to explain how I painted my Doom Angels. This tutorial will show the colors used to create the Doom Angels chapter, and the order they're applied.
Step #1
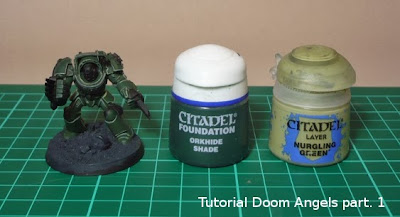
After applying a black undercoat, I paint the armor parts with Orkhide Shade, and highlights the armor's edges with Nurgling Green. Unfortunately, the Orkhide Shade doesn't exist anymore. But it seems that the new Caliban Green can replace it.
I don't add shades, Orkhide Shade is dark enough already.
Step #2
The second step's here to illuminate the mini by applying a warm color and forcing the highlights. To begin, I applied Mephiston Red on all weapons, lenses and purity seals. This Base issued from the new paint range is a good product, it allows you to have a red color without too much effort.
Then I'll enhance the light and shadows, using different reds shades. Upside surfaces are painted in a bright red like Blood Red. Downside surfaces are painted in a dark red, like Red Gore. Use real light and shadow to decide if you apply a bright, a dark, or no shade at all.
In order to make them stand out, all the edges are painted in Blood Red. The edges of the surfaces painted in Blood Red are painted in Fiery Orange, always in the idea of enhancing red parts' brightness.
I'm aware that the colors used here are from the old colors range. But the new colors range have the advantage of being more covering and brighter than the old one. Replace the triptych Red Gore, Blood Red and Fiery Orange by the following paints from the Layers range : Wazzdakka Red, Wild Rider Red and Troll Slayer Orange.
Step #3
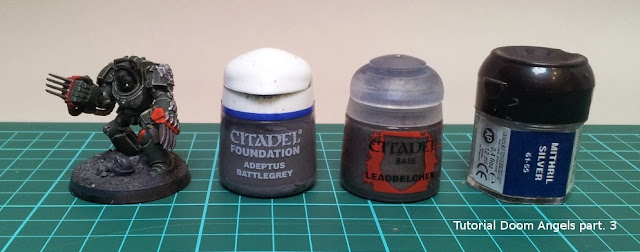
Now the basic colors are applied, let's pass to the metal. I started painting all the future metallic parts in Adeptus Battlegrey. Covering with a grey base allows you to erase all the small errors made during step # 1 & 2 and slightly reduces the number of metallic layers needed to have a good result.
Then I paint the edges with Mithril Silver, in order to add light on the metal parts.
Step #4
Final round : face painting. No secret, you'll need to try, work, fail and retry. It took me ten years and painting lessons to have something else than an alien hangover make-up.
Cherry on the cake, almost all the colors I'm using here are no longer avaible !
Step #5
Last, but not least, step ! Which will give a bad ass look to your Space Marine. I use diluted Dryad Bark to enhance all the shadows, creating an effect similar to the old lining technic.
The paint, diluted for less than a half, is applied in the hollows and on the metal parts. This breaks the shiny effect, enhances the model's colors contrast and makes it "alive".
PS : sorry for being late. It was my daughter birtday this week end. had two birthday parties in two days. And she's only 8...


No comments:
Post a Comment